Magnolia Lane Creative Studio

Visual Styling and Fine Art Wedding Design

Tag: bridal

Dia de los Muertos Wedding Inspiration

This time of year always reminds me of one of my all time favorite wedding inspiration projects from a few years ago done in partnership with Audra Wrisley Photography. Since this blog didn’t exist back then I thought I’d take this opportunity to share this throwback gem with you all today!

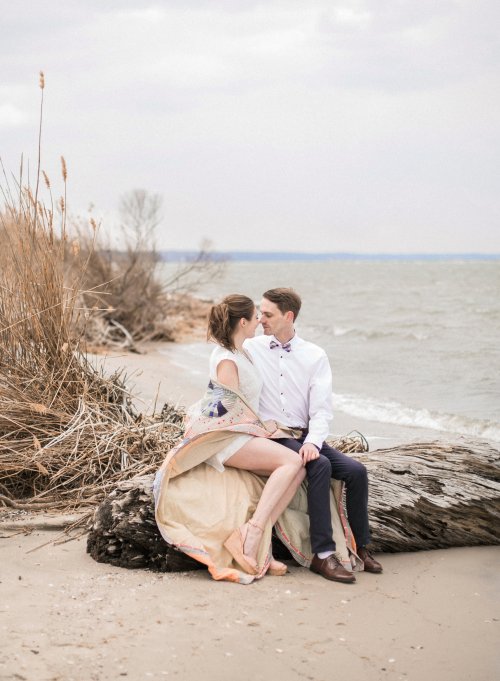
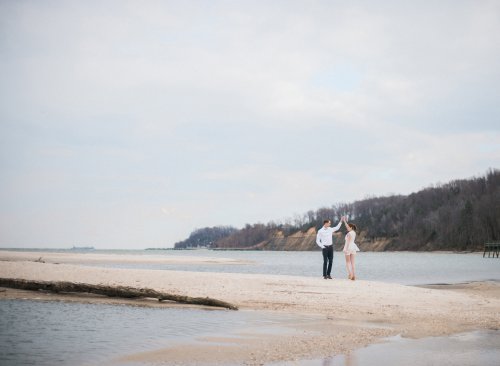
I am so inspired by the vibrant colors and motifs of the Mexican holiday: Dia de los Muertos. It’s just such a beautiful holiday; a colorful celebration and remembrance of the lives of loved ones who have passed on. What better wedding inspiration than a bold holiday that celebrates life itself? After all, your wedding day is the beginning of your new life together as married couple. I decided to draw upon the “until death do us part” line of common marriage vows to shape a beautiful celebration of a couple’s love and commitment to each other; focusing on the slightly dark romance of being together until the end.

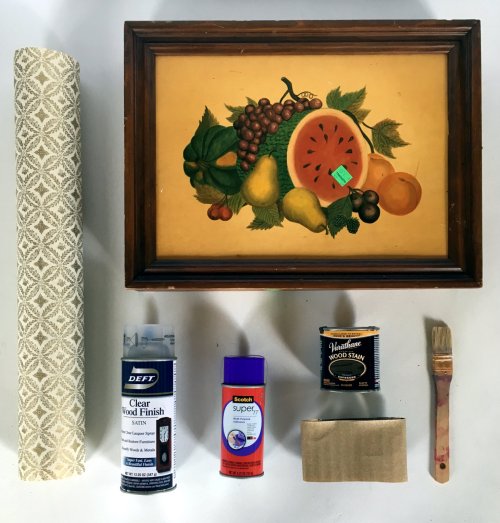
I wanted to incorporate some standard traditions such as sugar skulls, vibrant flowers, candles, and papel picado. Audra helped to add a modern flare with beautifully designed custom stationary using modern geometric patterns and creating gold leafed and fabric paper decoupaged terra cotta pots to use as centerpieces. The centerpieces incorporated succulents with fresh fruits and flowers to give a very warm and inviting feel. Want to learn how to make these fancy terra cotta pots yourself,  check out Audra’s DIY tutorial on Wedding Chicks!

We looked to Frida Kahlo for our beauty inspiration; pairing a floral crown with dark lips and a stunning vintage 1970’s Mexican wedding dress with pin-tucked cotton bodice and crochet lace insets throughout.

To compliment the design, we served a Mexican Peach cocktail (recipe below) in gold sugar rimmed glasses, Mexican sodas, pan de muerto, colorful cupcakes, and the most scrumptious alfajores decorated with powdered sugar!

Toast to Dia de Los Muertos with a Mexican Peach cocktail
1 1/2 oz. Pallini Peachcello
1 1/2 oz. Tequila
1 oz. Numi Organic White Nectar Tea (made into an ice tea)
1/2 oz. Simple Syrup

Want to see more? Check out the original feature on Wedding Chicks. Hope you have enjoyed these colorful photos & can take away some inspiration for your own events! Happy Friday!

Shop Amazon - Create an Amazon Wedding Registry

Delight in Handcrafted Details

In honor of this months feature in Whirl Magazine, we are sharing the making of pretty behind our top five lust worthy details of this stunning backyard wedding. Featuring some of our favorite projects and handmade details, this Pittsburgh wedding is jam packed with pretty little embellishments. A modern take on a whimsical garden wedding with a touch of vintage romance in the details, we will highlight some of the key design elements we crafted to pull this beautiful event together and bring our couples vision to life.

As artists one thing we are very passionate about here at Magnolia Lane is reuse and recycling, giving second life to something. We are huge fans of thrifted/vintage projects, we believe it adds unique character difficult to imitate and bringing something beautiful back to all its glory through restoration and repurpose gives us all the feels!

Salvaged And Refinished Vintage Door Frame Repurposed As Ceremony Arch:

This slideshow requires JavaScript.

Most cities have a few places where you can find salvaged building materials,  we scored this gem at Construction Junction in Pittsburgh. Its wonderful being able to support their mission while creating beautiful one of a kind pieces for projects we are working on here at Magnolia Lane. Since the wedding this beautiful door frame has been repurposed yet again, serving as the entrance to the Brides fathers garden.

Tea Cup Succulent Planter Wedding Favors:

It was no easy feat to accomplish this project, it took months of searching thrift stores and flea markets to collect the perfect set of about 100 tea cups. And even longer for propagation of a wide variety of succulents using a custom rigged green house only a pittsburgh dad could concoct. Transporting so many delicate wedding favors from our studio to wedding venue was a whole other challenge on its own – but oh so totally worth it!

This slideshow requires JavaScript.

The favors were designed to pair well with the stunning centerpieces which sat inside of metallic birdcages with arrangements designed by Petals and Promises. To keep the mismatched look of tea cups from overwhelming the design, they were divided into color stories for a cohesive look per each table. Now 100 new tea cup planters grace the homes and offices of guests instead of collecting dust on thrift store shelves!

Origami Paper Flower Sidewalls: 

Tents with sidewalls are so elegant but when your outside you kind of just want to embrace the beauty of whats around you. For this project we enhanced the look of our tent while fully embracing the beautiful garden around us by creating sidewalls of ombre garlands made of origami flowers and their effect could not have been more magical.

Vintage Doily Pennant Banners & Garden Vintage Birdcages:

To adorn the ceilings and the tree tops surrounding the venue we hung loads of vintage style birdcages brimming with plants and created very romantic feeling pennants using vintage doilies and ivory ribbon.

If you have a vision, allow us to help you bring it to life! Visit our contact page to get in touch today =)

What are some of your favorite handmade details you have seen at weddings recently?

The Knot Feature – What I Wore

In honor of my up coming two year engagement anniversary and #TheKnot featuring our love story in their DC, MD & VA fall/winter 2016 issue, I wanted to share my engagement outfit style for our beachside engagement session with Audra Wrisley Photography.

 “James concocted a plan to propose to Jean while on her family’s annual vacation in North Carolina’s Outer Banks. The only problem? Jean’s sister’s boyfriend also had plans to propose that same week! With the help of Jean’s brother, the men decided to propose on different parts of the beach without overshadowing the other. One evening during a sunset walk, James got down on one knee and asked jean to make him the luckiest man alive. “I said absolutely before he even got all of the words out,” she says.”

Since the proposal happened on the beach, I really wanted to have our engagement photos taken on a beach to commemorate that detail of our story. Audra was kind enough to find us a beach location within driving distance of the DC metro area at Flags Pond Nature Park and it couldn’t have been a more perfect backdrop for our visual announcement of our engagement!

003_J&W033_J&W023_J&W079_J&W

I love putting together outfits and anyone who knows me knows that outfit planning is something I greatly look forward to every week, I am also missing my department store visual days in styling looks for hundreds of mannequins on the regular, so posts like this help to fill that void!

Planning outfits for portrait sessions is an important part of helping to capture a moment or tell a story in the most visually appealing way. Since our important life events are the most photographed and most likely to become cherished heirlooms for future generations, it helps to both look and feel good about how your image is preserved.

I wanted the style to be a little more structured for our engagement shoot since the overall style of our wedding was going to be more boho so I kept the looks for Wyatt and I tailored and color palette crisp and bold.

Her Style Details:

To compliment a modern engagment ring I paired this striking lace Isabel dress by BCBG Max Azria with a pair of Jimmy Choo cork and embroidery wedges. I kept jewelry very simple and minimal. Beauty by Lori Nansi of Le Mariee.

His Style Details:

A pair of slim navy Ben Sherman pants with a crisp fitted white button down and topped with a preppy pink and navy bow tie to compliment the color in her shoes.

Need help putting together a look or two for your special occasions? Visit my contact page to reach out about outfit styling services, Id love to help! For details on re-creating the look featured in this post check out my Polyvore.

Beachside Engagement Outfit Inspo


Jimmy choo shoes
therealreal.com

Ippolita charm necklace
therealreal.com

Kenneth Cole analog watch
nordstromrack.com

Leather belt
tigerofsweden.com

Giorgio Armani men s fragrance
$89 – selfridges.com

Men s accessory
popmap.com

Opi nail lacquer
overstock.com

Inspirational wall art
$28 – trouva.com

DIY Dip-Dyed Bridal Backdrop


After a recent trip to Anthropologie,  I was totally in awe of their wisteria installation and loved the idea of creating something similar for a bridal inspiration project that was in the works.

IMG_9788

This masterpiece was made with cupcake liners, balloons, paper and yarn. I wanted to achieve a similar impact and effect on a smaller budget and in a short time frame, so I searched for other ideas that could provide a similar whimsical abstract floral effect and act as a backdrop for our shoot.

After some searching I came across this amazing DIY on style me pretty for an ombre coffee filter backdrop. You can follow their awesome tutorial on how to make this yourself and I’ll share my experience in making this project below.

IMG_9962

Things you will need:

600+ coffee filters (about 40ish per strand you plan to make), fabric dye, fishing line, scissors, needle, about 10 hours

Their tutorial suggests to use staples to attach coffee filters to fishing line – I eliminated the need for this additional resource and decided to just use a needle and thread to string the filters tying spacer knots between each one

This slideshow requires JavaScript.

Dying of filters:

The dying process was not as simple and took longer than I thought it would. (especially the drying!)  I found it very difficult to dye large numbers of filters at a time and attain an even solid saturation. In playing with the dying process I achieved interesting textures and color variants, which I ended up loving for the botanical look I was trying to create.

Folding of filters:

I used ~650 coffee filters and was able to fold ~120 filters per hour.  I spent 5.5 hours folding coffee filters into triangles

Stringing the filters:

I was able to make one strand per 15 mins or so. Each strand was about 8 feet long and contained 45-55 coffee filters leaving about 12+ inches at the top to allow room for hanging. I made 12 strands which took a total of about 3 hours.

For around $20 in material costs and about ten hours you can create a beautiful photo/wedding backdrop. Check out Ruffled Blog to see how we used this insanely gorgeous backdrop!


Modernizing A Vintage Spice Rack

One thing I notice on many wedding and gift registries are spice sets/racks. Every couple starting out needs a staple set of spices and seasonings to get their kitchen in gear. I love cooking and enjoy gifting kitchen related items from registries and spice racks are usually a part of my go to gift package for the bride. With multiple weddings this summer, I decided to get creative when I noticed a spice rack on my sister’s registry. I figured for about the same price as your average rack I could create a unique piece that could save counter space in her small kitchen and have a big impact on style at the same time.

So I set out on a thrift adventure to find an antique wooden spice rack that I could modernize and personalize. Spice racks can be so boring and bulk up countertops in small kitchens. So I knew I had found the perfect one for this project when I came across this cabinet style spice rack. It had a great door and featured beveled detailing on front and a vintage diagram of “Herbs & Spices — How To Use Them” on the inside.

IMG_9653

With its large picture space on the outside and a latching door to keep all those spice jars out of sight and organized, I saw the opportunity for this to be transformed to something that could be both pretty and functional.

IMG_9781

Knowing my sister’s kitchen style made it easy for me to envision modernizing this dated 1970’s style rack to work in her home. I chose a dark espresso wood stain and a paper that had a very classic laurel leaf motif but felt bold and modern. The pretty cream and gold color is balanced by the dark wood stain and keeps it elegant. I decided to edge one of the bevels in gold leaf to better tie elements together.

Supplies: thrifted spice rack, pretty patterned paper (like this), wood stain, sand paper, clear wood finish, spray adhesive, masking tape, tape measure, razor blade, liquid gold leaf

IMG_9650edit


  1. Take apart cabinet and sand off old finish. If you have any areas that need to be taped off when staining/painting do so now with masking tape. I needed to cover the center image area so used newspaper and masking tape to cover.
  2. Stain or paint sanded wood with chosen color, I used 3 coats of stain and this process took about 3 days doing 1 coat per day.
  3. For extra detail, I decided to rim one of the bevels in the front of the cabinet with liquid gold leaf. (this is an optional step)
  4. Seal with a clear wood finish.
  5. Carefully cut paper to size needed and remove masking tape and newspaper to apply spray adhesive.
  6. Adhere paper to cabinet and smooth flat.

This slideshow requires JavaScript.

For a beautiful and unique Bridal Shower / Housewarming gift, this project took about a week to complete and materials cost less than $40. To complete the gift, I’ll fill this cabinet with a starter spice set, like this one for a complete gift under $100.

A re-finished cabinet like this one could also be a perfect addition to bathroom or laundry room and used for storing essential oils or as a medicine cabinet.

IMG_9884IMG_9890